

Granite is highly durable but difficult to cut. Whether trimming an island overhang or shortening a vanity slab, knowing how to cut granite countertop pieces safely protects your investment. Professional fabricators handle large projects with computer-guided bridge saws, yet skilled installers can achieve clean field cuts using handheld tools. Success depends on proper workspace stabilization, personal protection, and disciplined cutting techniques.
Choosing the best granite cutting tools
Standard masonry blades cannot cut natural granite; the stone's crystals quickly destroy steel teeth. Key granite cutting tools every fabricator relies on include:
- Circular wet stone saws: Feature integrated water feeds to cool the blade and suppress silica dust.
- Continuous rim diamond blades: Yield the cleanest finish on visible countertop edges.
- Variable speed angle grinders (2500-4500 rpm): Provide maneuverability for sink cutouts and curved arcs.
- Aluminum guide rails & padded C-clamps: Create a rigid fence for straight cuts without scratching the stone.
- Vacuum brazed core bits: Cut corner relief holes inside cutouts before making plunge cuts.
Personal safety equipment is equally critical. Cutting granite generates crystalline silica dust that causes irreversible lung damage. Always wear a tight-fitting N95 or P100 respirator, even when cutting wet. Additionally, use sealed safety goggles against stone fragments, 28+ dB ear protection, heavy work gloves, and steel-toe boots to safely handle heavy slabs.
Pre-cut preparation: setup & marking
Proper preparation prevents granite from fracturing under stress. Follow these essential steps before cutting:
- Build a rigid platform: Support ¾-inch plywood on heavy workbenches capable of holding at least 400 lbs.
- Add foam insulation: Top the plywood with 2-inch rigid foam to absorb vibration, support the entire stone, and allow blade clearance.
- Clean the surface: Wipe the granite with denatured alcohol to remove scratch-causing debris.
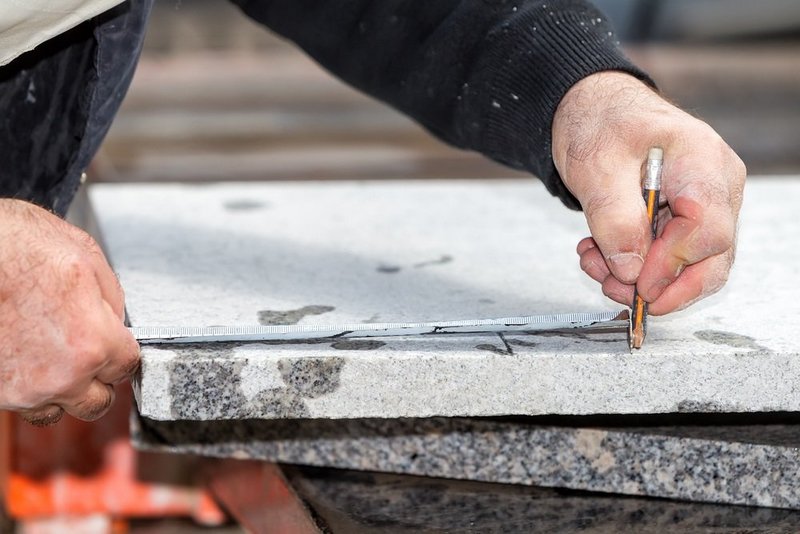
- Tape and mark the cut: Apply blue painter's tape over the cutting path to prevent micro-chipping, then mark your squared line directly on the tape.
When cutting granite countertops, leave a ¹⁄₁₆-inch margin on edges that will receive custom profiling. This extra stock leaves room for smoothing and polishing without reducing your final countertop dimensions.
Step-by-step: how to cut granite countertops
Cutting thick stone requires steady blade velocity and continuous lubrication. Forcing a blade into the cut leads to motor stall, blade deflection, chipped edges, and cracked slabs. Follow these procedural steps to execute clean straight cuts through 2 cm or 3 cm granite slabs.
Step 1: Secure the slab
Place the granite face up on a foam-covered workbench, ensuring the cut line is fully supported by foam so the stone doesn't snap under its own weight. Secure the slab with padded bar clamps placed entirely out of the saw's path, and verify the table is completely stable.
Step 2: Establish the cut line
Place an aluminum guide rail parallel to the cut line, offset by the exact distance between the saw blade and the base plate edge. Clamp the rail securely at both ends. Manually slide the disconnected saw along the track to ensure the blade perfectly follows the intended line without hitting the clamps.
Step 3: Perform shallow relief scoring
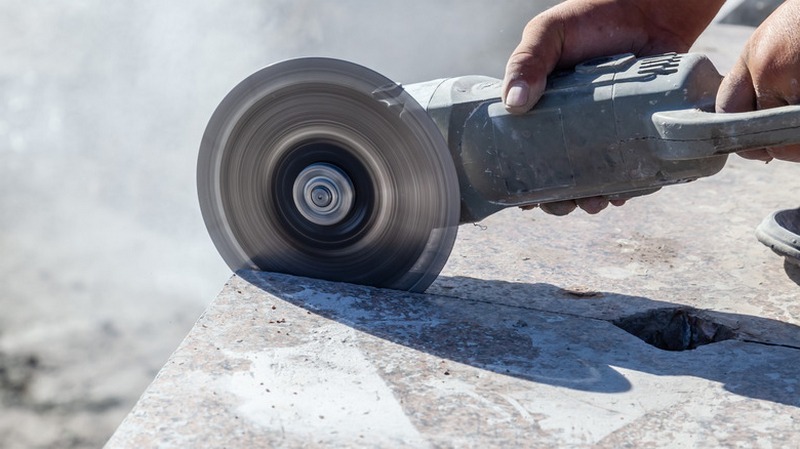
Never cut through granite in a single deep pass. Connect the wet saw's water supply to maintain a steady flow across the blade. Set the cutting depth to ⅛″–¼″. Let the saw reach full speed, lower it into the stone, and advance smoothly. This shallow score cut prevents chipping and crystal tear-out on the polished surface during the deeper pass.
Step 4: Execute the full-depth primary cut
Adjust the saw depth to extend ¼″ below the stone into the foam. With the motor and water running, lower the blade into the scored track. Advance at a steady pace without forcing it; a dropping motor pitch means you are pushing too fast. Ensure the runoff slurry is runny and gray—thick, pasty slurry indicates insufficient water flow and an overheating blade.
Step 5: Support the offcut piece
During the final 3″, the remaining stone can snap prematurely and damage the edge if the offcut drops. Pause the saw, insert a shim into the cut behind the blade to prevent pinching, and have a helper support the offcut piece from beneath without lifting. Restart the saw and gently finish the cut at a slower pace, keeping the saw base flat.
Cutting methods compared
Every fabrication method in the table above serves distinct operational roles in stone cutting. Matching your project scope to the right method prevents ruined slabs and wasted labor.
- A stationary granite saw machine, such as an automated bridge saw or 5-axis waterjet system, represents the pinnacle of commercial stone fabrication. In professional facilities like Cabinets-Countertops in Cleveland, automated bridge saws utilize heavy diamond blades measuring 14″ to 18″ mounted on rigid overhead steel gantry beams. These industrial systems cut through 3 cm slabs at speeds up to 10 ft per min with continuous water floods exceeding 10 gpm.
- The immense mass of a bridge saw prevents blade deflection and vibration chatter, producing dead-square edges that fit together with hairline seams. However, these machines require 3-phase industrial power, specialized drainage trenches, and crane lifting systems, making them strictly shop-based solutions for primary fabrication.
- For field installations, a handheld circular wet saw represents the most practical tool. When paired with a clamped aluminum guide rail, a 5″ or 7″ wet stone saw delivers edge accuracy comparable to shop equipment. Built-in water delivery keeps diamond segments cool and flushes abrasive slurry out of the kerf. This method works best for cross-cutting straight countertop runs, trimming backsplashes, and shortening island overhangs directly on the jobsite.
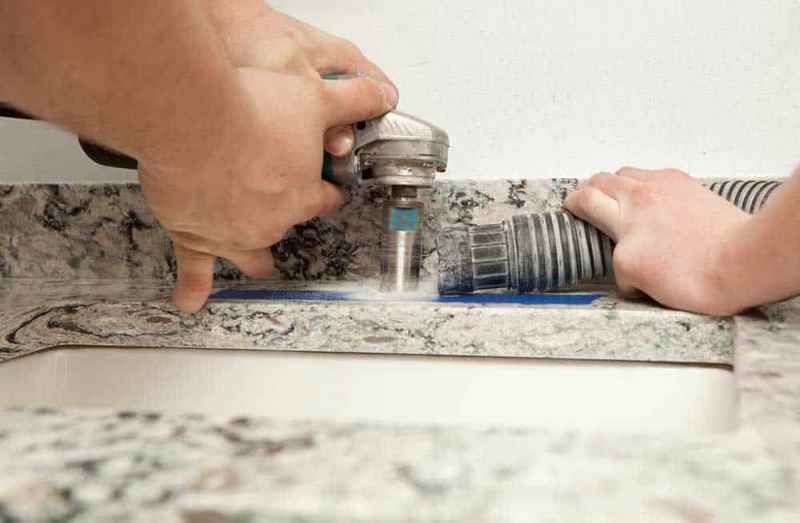
- A handheld electric granite cutter or angle grinder provides the agility needed for tight, non-linear cuts. Grinders excel at removing stone for undermount sinks, faucet cutouts, and electrical outlet cutouts where circular saw base plates cannot maneuver. However, angle grinders spin small 4½″. blades between 6000 rpm and 11000 rpm. Without a specialized dust shroud and vacuum system, dry angle grinding fills enclosed rooms with thick clouds of respirable silica dust within 15 sec.
How to cut granite by hand
Learning how to cut granite by hand requires patience, physical stamina, and correct abrasive materials. Manual granite cutting serves as a necessary backup when power equipment is impractical. Because granite rates 6-7 on the Mohs hardness scale, standard blades fail. You must use a heavy-duty hacksaw equipped with a diamond-coated wire blade or tungsten carbide grit rod.
- Secure and Score: Clamp the stone to a foam-backed workbench. Using a tungsten carbide chisel and straightedge, make at least 20 heavy scoring passes along your cut line to create a guide trench that prevents the blade from wandering.
- Lubricate: Spray the cut with a water and dish soap mixture every 30 sec to cool the blade and clear stone dust.
- Saw: Place the wire blade inside the scored channel. Apply steady downward pressure using long, uniform strokes that utilize the entire blade length. Short, rapid strokes overheat the wire and strip the abrasive diamond coating.
- Finish: Manual cutting is slow; expect it to take 45–60 min per 6″ on a standard 2 cm slab. The resulting rough edge will require extensive smoothing with diamond hand pads prior to installation.
Post-cut finishing: grinding, polishing & sealing
Cutting a countertop slab creates a raw, sharp edge with micro-chipping. Bringing that cut edge up to a professional, factory-grade finish requires diamond profiling, multi-stage polishing, and chemical sealing. Follow these four steps:
- True the edge: Mount a 4-inch 50-grit diamond grinding cup wheel on a wet polisher running at 3000 rpm. Hold the grinder at exactly 90 degrees to the countertop (or 45 degrees for a roundover or bevel). Use overlapping passes to erase saw marks and true the vertical profile.
- Polish in sequential stages: Use a water-fed polisher (2000–3500 rpm) with flexible hook-and-loop diamond resin pads in seven progressive grits: 50, 100, 200, 400, 800, 1500, and 3000. Spend roughly 2 min per linear foot on each stage. Lower grits remove grinding scratches, mid-grits create a smooth satin luster, and high grits produce deep optical reflection.
- Buff with polishing paste: Attach a white felt buffing wheel to the grinder and apply tin oxide polishing compound. Run the tool dry at 1500 rpm using rapid, light circular passes. The friction and paste bring out the natural gloss of the embedded quartz.
- Apply an impregnating sealer: Unsealed stone permanently absorbs water, grease, and colored liquids. Wipe the edge with clean acetone to remove lingering polishing oils, then let dry for 20 min. Apply a generous coat of penetrating fluoropolymer sealer, let it absorb for 15 min, and buff away all surface haze with a clean cotton towel.


