

Granite remains 1 of the most durable stone surfaces for residential kitchens and bathrooms. Slabs fabricated from natural stone resist heat, impact, and everyday culinary wear. However, granite is an igneous rock formed under subterranean pressure, leaving an internal matrix of microscopic pores. Without protection, liquids penetrate these pores, causing persistent discoloration.
Homeowners can maintain their surfaces with basic household supplies and commercial impregnators. This technical guide outlines chemical selection, surface prep, step-by-step application, and maintenance schedules.
Why sealing granite countertops matters
Natural stone porosity varies across individual slabs depending on mineral composition and quarry origin. Slabs consist primarily of quartz, feldspar, and small quantities of mica. Quartz has 0 porosity, but feldspar and natural micro-fissures absorb liquids through capillary draw. When spills sit on an untreated surface, internal absorption begins in min.
Common household substances present distinct risks to unsealed granite surfaces:
- Cooking oils, melted butter, and animal fats leave greasy dark marks that penetrate several mm below the polished face.
- Red wine, dark roast coffee, fruit juices, and tea deposit organic tannins that bond chemically to internal minerals.
- Citrus juices, vinegar, and tomato sauce contain mild acids that can dull calcite deposits present in certain granitic slabs.
- Tap water carries dissolved minerals that remain behind as chalky white rings after moisture evaporates.
Applying chemical protection alters the surface tension inside stone pores. Routine sealing granite countertops prevents internal absorption by depositing specialized polymers directly into open voids. These compounds cure inside the stone to repel polar liquids like water and non-polar liquids like cooking grease.
Treating the stone fills microscopic voids, keeping liquids on the exterior where a microfiber cloth removes them safely. An unsealed slab can absorb olive oil in 5 min, leaving an oil shadow. A treated slab keeps that oil suspended on the exterior for several hr, allowing simple cleanup without residual staining.
Choose the right granite sealer
Selecting the proper formulation ensures long-term protection without altering your stone's appearance. Countertop sealers fall into two main categories: topical film-formers and penetrating impregnators.
Topical sealers form a physical barrier on the surface. While useful for exterior pavers, they perform poorly on polished indoor countertops because they cannot form a strong mechanical bond. They scratch easily from knives, cloud from hot pots, and trap moisture that causes white mineral crusts beneath peeling coatings.
Penetrating sealers (impregnators) are the professional standard. Rather than sitting on top, they use tiny carrier molecules to transport protective solids deep into the stone's capillaries. As the liquid evaporates, these solids bond chemically to interior pore walls, allowing the stone to breathe while retaining its natural texture and polished gloss.
Impregnators use either water or solvent carriers. Water-based formulas offer low VOCs, minimal odor, and fast drying. Solvent-based formulas penetrate denser stones deeper and provide superior grease resistance.
A 16 oz container covers 150 to 200 sq ft with one coat. Ultimately, proper granite countertop sealing sealing relies on matching this chemistry to your specific slab's density.
Prepare the granite countertop for sealing
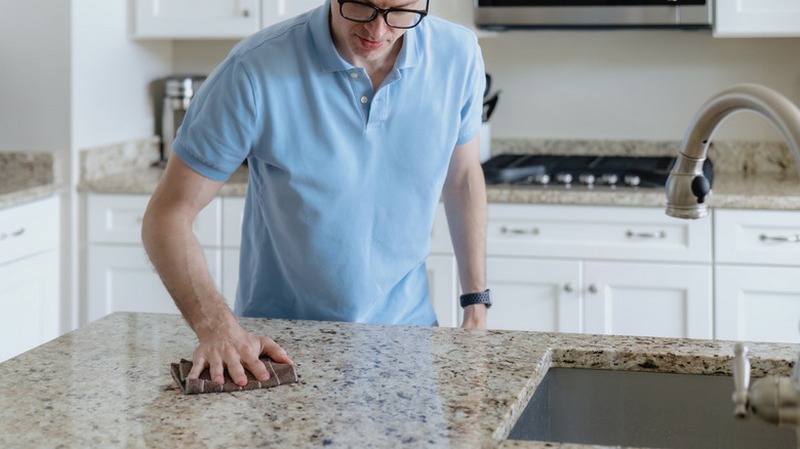
Proper surface preparation is crucial for a stone sealer to bond. Clear the countertop entirely and inspect it for spots or debris. Clean the stone using a pH-neutral stone cleaner or a 1:1 mix of 70% isopropyl alcohol and distilled water, wiping with a microfiber towel. Avoid standard household cleaners like vinegar, bleach, or dish soap, as they will etch the stone or leave films that clog pores.
Scrape stubborn residue gently with a razor blade held at a 45° angle. Extract pre-existing oil stains by applying a baking soda and alcohol/acetone poultice, covering it with plastic wrap for 24 hr. Finally, allow the stone to dry for at least 24 hr before sealing to prevent trapped moisture from causing cloudy white hazing.
How to seal granite countertops
Applying a protective treatment is a direct process when completed methodically. Successful execution requires even distribution, controlled dwell times, and thorough buffing before liquid dries on the exterior. Learn how to seal granite countertops properly to preserve stone durability and maintain natural visual depth.
Follow this numbered sequence for consistent results:
- Clear the entire surface, clean thoroughly with pH 7 stone cleaner, and let the stone dry for 24 hr.
- Mask adjacent cabinets, appliances, and sink rims with blue painter tape.
- Test the sealer on a 2″ by 2″ hidden area to confirm visual compatibility.
- Apply the penetrating formula evenly across 3 ft by 3 ft sections with a microfiber pad.
- Keep the slab wet with product for 10 to 15 min to allow deep pore penetration.
- Buff off all remaining liquid residue completely using dry microfiber cloths.
- Apply a 2nd coat if the stone absorbs the first coat in under 5 min.
- Allow the treated surface to cure undisturbed for 24 hr before placing appliances or preparing food.
Clear and protect adjacent areas
Protect adjoining surfaces that react poorly to stone chemicals. Use blue painter tape to mask wooden cabinet fronts, painted drywall, stainless steel sink rims, and caulk joints. Solvents can leave a greasy film on stainless steel or soften uncured caulk lines. Open windows and turn on kitchen exhaust fans to ensure fresh airflow, especially with solvent-based products. Wear nitrile gloves to protect your skin from drying, and use safety glasses to guard against accidental splashes.
Conduct an inconspicuous spot test
Never treat an entire kitchen without testing the chemical formula on your specific slab. Select a discrete 2 in by 2 in area, such as behind a microwave or under an overhanging counter edge. Apply 3 drops of sealer to the test spot, let it sit for 10 min, and buff dry. Wait 2 hr to evaluate the result. Verify that the chemical did not darken the slab unexpectedly or alter the polished sheen.
Apply the penetrating liquid evenly
Divide the kitchen into workable sections measuring approximately 3 ft by 3 ft or 10 to 15 sq ft each. Working in smaller sections prevents the carrier fluid from evaporating prematurely. Pour the impregnator into a clean spray bottle, or dispense small amounts directly onto the counter. Spread the liquid across the section using a clean foam applicator or microfiber cloth. Understand how to apply granite sealer by maintaining a continuous, uniform film across the stone without creating large puddles.
Monitor dwell time and penetration
Let the sealer rest undisturbed on the stone face for 10 to 15 min. This dwell period allows the carrier solution to draw protective polymers deep into microscopic rock capillaries through natural absorption. If the stone drinks the liquid in under 3 min, the slab is highly porous. Apply additional liquid immediately to keep the section uniformly wet for the entire 10 to 15 min period. Do not allow the sealer to dry into a sticky film.
Buff away all residual liquid
After 15 min of dwell time, wipe the section completely dry. Use clean, dry microfiber towels to lift every drop of unabsorbed liquid from the stone face. Rotate your microfiber cloth frequently to expose dry fabric surfaces. Buff the stone in overlapping circular motions until the surface feels slick and dry. Leaving an unabsorbed impregnator to dry on top of polished granite leaves a cloudy film that requires mineral spirits to remove.
Determine the need for a second coat
Dense dark granites require only 1 coat of impregnator. Highly porous light-colored granites, such as white or cream slabs, often require 2 coats to achieve full saturation. If the stone absorbs the first application rapidly during the dwell period, wait 20 to 30 min, then apply a 2nd light coat following the same procedure. Buff away all excess liquid until the stone is dry and reflective.
Respect the critical cure time
Chemical bonding requires adequate curing time. While the surface feels dry within 1 hr, internal fluoropolymers need time to cross-link securely inside stone capillaries. Avoid touching the countertops for 2 to 4 hr after buffing. Keep the surface completely dry and free from water splashes, food spills, and cleaners for a full 24 hr. Placing kitchen appliances or wet sponges on the stone before 24 hr disrupts the chemical cure.
How to reseal granite countertops
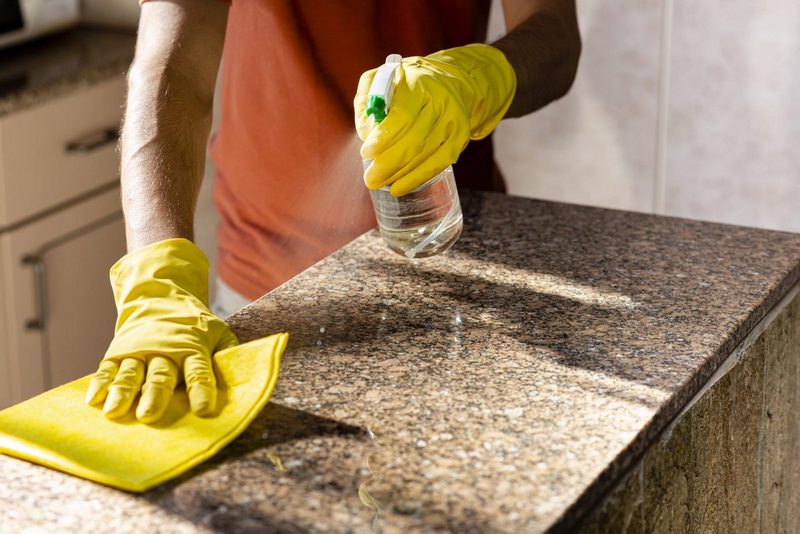
Resealing granite countertops is straightforward because fresh impregnator bonds directly to existing polymers without stripping the stone down to bare rock. Over 1 to 3 years of daily use, friction, detergents, and heat deplete this protective surface barrier.
Before applying the product, remove any previous gummy residue with mineral spirits or acetone. Here is how to reseal granite countertops effectively without wasting product: focus your resealing efforts primarily on high-wear zones around the sink and cooktop to avoid wasting product.
Signs Your Counters Need Sealing
- Water drops flatten and darken the stone within 10 minutes.
- Areas near the faucet turn grey or black when wet.
- Cooking oil leaves temporary dark shadows.
- The polished surface feels rough rather than glassy.
Sealing Frequency Stone color and geological density dictate your schedule:
- Light Granite (White, Grey): Highly porous; reseal granite countertops every 6 to 12 months.
- Medium Granite (Brown, Gold, Red): Requires treatment every 12 to 18 months.
- Dark Granite (Black): Highly dense; needs sealing every 24 to 36 months, or sometimes never.


