

A joint can remain visible even when the stone is expertly installed. Its position, filler color, and surrounding veins determine how much attention it draws.
Planning countertop joints before cutting helps you avoid an awkward line through the kitchen's main feature. Review the layout alongside the actual slabs so you understand the finished appearance.
Why do marble countertops have seams?
Natural slabs have limited usable dimensions. Long runs, corners, and large islands may require separate pieces, even when the design looks continuous on a floor plan.
Slab dimensions and usable stone
The available cutting area can be smaller than the slab's overall size. Damaged edges, weak areas, and the placement of prominent veins influence which sections the fabricator can use.
For example, an island may fit within a slab's length but exceed its usable width, making seams in marble countertops necessary. Selecting a larger slab might solve that problem, although availability and the final cutting layout still need confirmation.

Access and structural planning
A finished section must also pass through doorways, hallways, and stairs. A piece that fits the kitchen can still be too large to move safely into the house.
Joint placement must account for cabinet support and appliance openings. A convenient visual location may need extra reinforcement or a different arrangement once the fabricator assesses the structure.
Discuss these constraints before approving the design. Reducing the number of joints can increase material waste, handling difficulty, or cost, so compare complete proposals.
What do marble countertop seams look like?
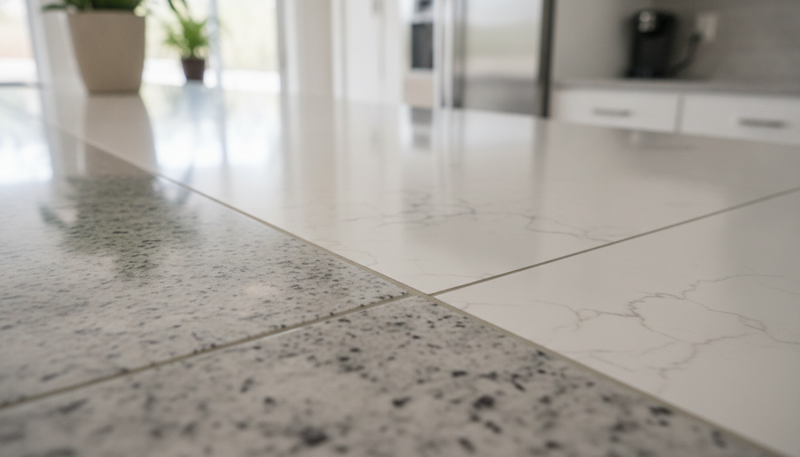
A finished joint usually appears as a narrow line of tinted adhesive between adjacent pieces. The surrounding stone should meet evenly, with a consistent gap along the connection.
Well-executed marble countertop seams may blend into the background from across the room while remaining noticeable up close. White stone can reveal a slightly different filler shade, and strong veins can highlight where the pattern changes.
Width, alignment, and edge details
A commonly cited target for slab joints is about 1/16 in, approximately 1.5 mm. Confirm the specified width and permitted tolerance with the fabricator before work begins.
Small bevels along the meeting edges can make the visible filler line look wider than the underlying gap. Ask to see a completed example using a similar edge treatment.
A height difference between adjacent surfaces is called lippage. A pronounced ridge, an open gap, or missing filler deserves inspection rather than an assumption that every visible line is normal.
Lighting and viewing distance
Daylight crossing the surface can reveal slight height or sheen differences. Under cabinet lighting may emphasize a connection that looks less obvious under ceiling lights.
Inspect the surface from ordinary standing positions and from the main room entrance. Close inspection is useful for checking workmanship, but it should accompany a view of the whole countertop.
How to make marble seams less visible
Start with the cutting plan, while changes are still possible. Once the stone is fabricated, relocating a joint usually requires replacing or recutting sections.
The most effective way to soften marble seams is to coordinate placement, vein direction, and filler color. None of these choices guarantees an invisible result, but together they can make the transition less distracting.
Choose a location with adequate support
Ask the fabricator to mark every proposed connection on the drawing. Compare the view from seating areas with the support available beneath each location.
- Support: Place connections over suitable cabinetry or designed reinforcement.
- Openings: Evaluate sink and cooktop cutouts individually because narrow stone sections need careful handling.
- Sightlines: Keep an uninterrupted focal area where the layout and slab size allow.
- Access: Confirm that each proposed piece can reach its final position safely.
A sink location can shorten the exposed length of a joint, but it also introduces handling and support considerations. It should be an engineered layout choice, not an automatic hiding place.
Match veins and background color
Review photographs of the selected slabs with the cutting outlines shown. Look at the direction and thickness of major veins where the pieces will meet.
Matching the background matters too. A pale section beside a noticeably darker section can remain conspicuous even when their veins align.
Bookmatched slabs create a mirrored pattern rather than a continuous vein. Decide which effect you prefer, and ask whether it requires additional material.
Approve the filler and finish
The adhesive should suit the stone and blend with its background. A cured sample can help establish realistic color expectations, especially with pale or translucent material.
Honed finishes reduce reflections but do not conceal interrupted veining. Polished finishes can reveal changes in reflected light, so assess examples in lighting similar to your kitchen.
How visible are seams in marble compared to other materials
Pattern and workmanship often influence appearance more than the material name. A quiet marble may show a line more clearly than a busy granite, while dramatic veining can expose pattern breaks.
When comparing countertop seams, judge both the adhesive line and the transition between adjacent patterns. A narrow connection can still attract attention if a dark vein stops abruptly.
Material comparison
The table describes typical visual tendencies rather than guaranteed results. Compare finished installations as well as samples before choosing.
Marble and quartzite vary from slab to slab, so a small sample cannot show every transition. Quartz offers more predictable backgrounds, although large vein patterns still require deliberate positioning.
A solid surface can provide a less noticeable connection in suitable colors. That appearance comes with different performance and care characteristics, which should also inform the purchase.
How are marble countertop seams installed?
Installation begins with accurate measurements and a stable cabinet base. The crew checks the fit before bonding adjacent sections.
From template approval to final inspection
The exact procedure depends on the stone, adhesive, and support design. A typical professional installation follows this sequence.
- Template: Record cabinet dimensions, walls, cutouts, overhangs, and access restrictions. Confirm appliance and sink specifications.
- Layout: Position the countertop sections on the selected slabs. Obtain approval for joint locations and major vein transitions.
- Fabrication: Cut the sections and prepare the meeting edges. Check their fit and complete any specified reinforcement.
- Dry fitting: Set the pieces in position without completing the bond. Check support, alignment, and the planned gap.
- Bonding: Prepare clean, dry edges and apply compatible tinted adhesive. Use alignment equipment as needed to bring the surfaces together.
- Finishing: Remove excess adhesive using the appropriate method. Allow the specified curing time before loading or using the area.
An accurately prepared seam in the stone does not automatically require sanding the surrounding factory finish. Unnecessary abrasion can create a dull patch, so finishing methods must suit the surface.
What to check before signing off
Review the approved drawing alongside the installed countertop. Check the front edge, the full joint length, and the connection's appearance under normal room lighting.
Look at the seam in marble countertop displays to compare filler continuity and surface alignment. Ask the installer to assess roughness, unexpected color differences, or an obvious height change before accepting the work.
Keep the care instructions and adhesive curing guidance with your project records. These details help distinguish a later maintenance issue from an installation concern.
Cabinets-Countertops serves homeowners and trade professionals from its Cleveland showroom and lists marble among its material options. Bring your cabinet plan and preferred stone style to discuss material selection and fabrication requirements.
How to maintain and clean marble countertop seams
Use a soft cloth and a cleaner approved for marble. Follow the product's dilution instructions and dry the surface after cleaning.
Daily cleaning and spill control
Blot spills promptly, particularly near joints and cutouts. Avoid vinegar, lemon cleaners, and abrasive powders, which can damage the surrounding stone.
Do not dig into the filler with a blade or stiff brush. If residue remains after gentle cleaning, ask the installer which product is compatible with both the marble and adhesive.
Use trivets beneath hot cookware and cutting boards during preparation. Keep standing water away from a damaged connection until it has been inspected.
Sealing and repairs
An impregnating sealer may improve stain resistance when recommended for the selected stone. It does not fill gaps, restore failed adhesive, or prevent acid etching.
Follow the supplier's resealing guidance rather than assuming every surface needs treatment on the same schedule. The stone's absorption, existing treatment, and use influence maintenance.
Report widening gaps, loose filler, or movement promptly. A repair may involve replacing adhesive, but recurring separation also requires checking the support below.
Before applying a repair kit, identify the cause and confirm the warranty terms. An unsuitable filler can complicate professional repairs or leave permanent discoloration along the edges.


